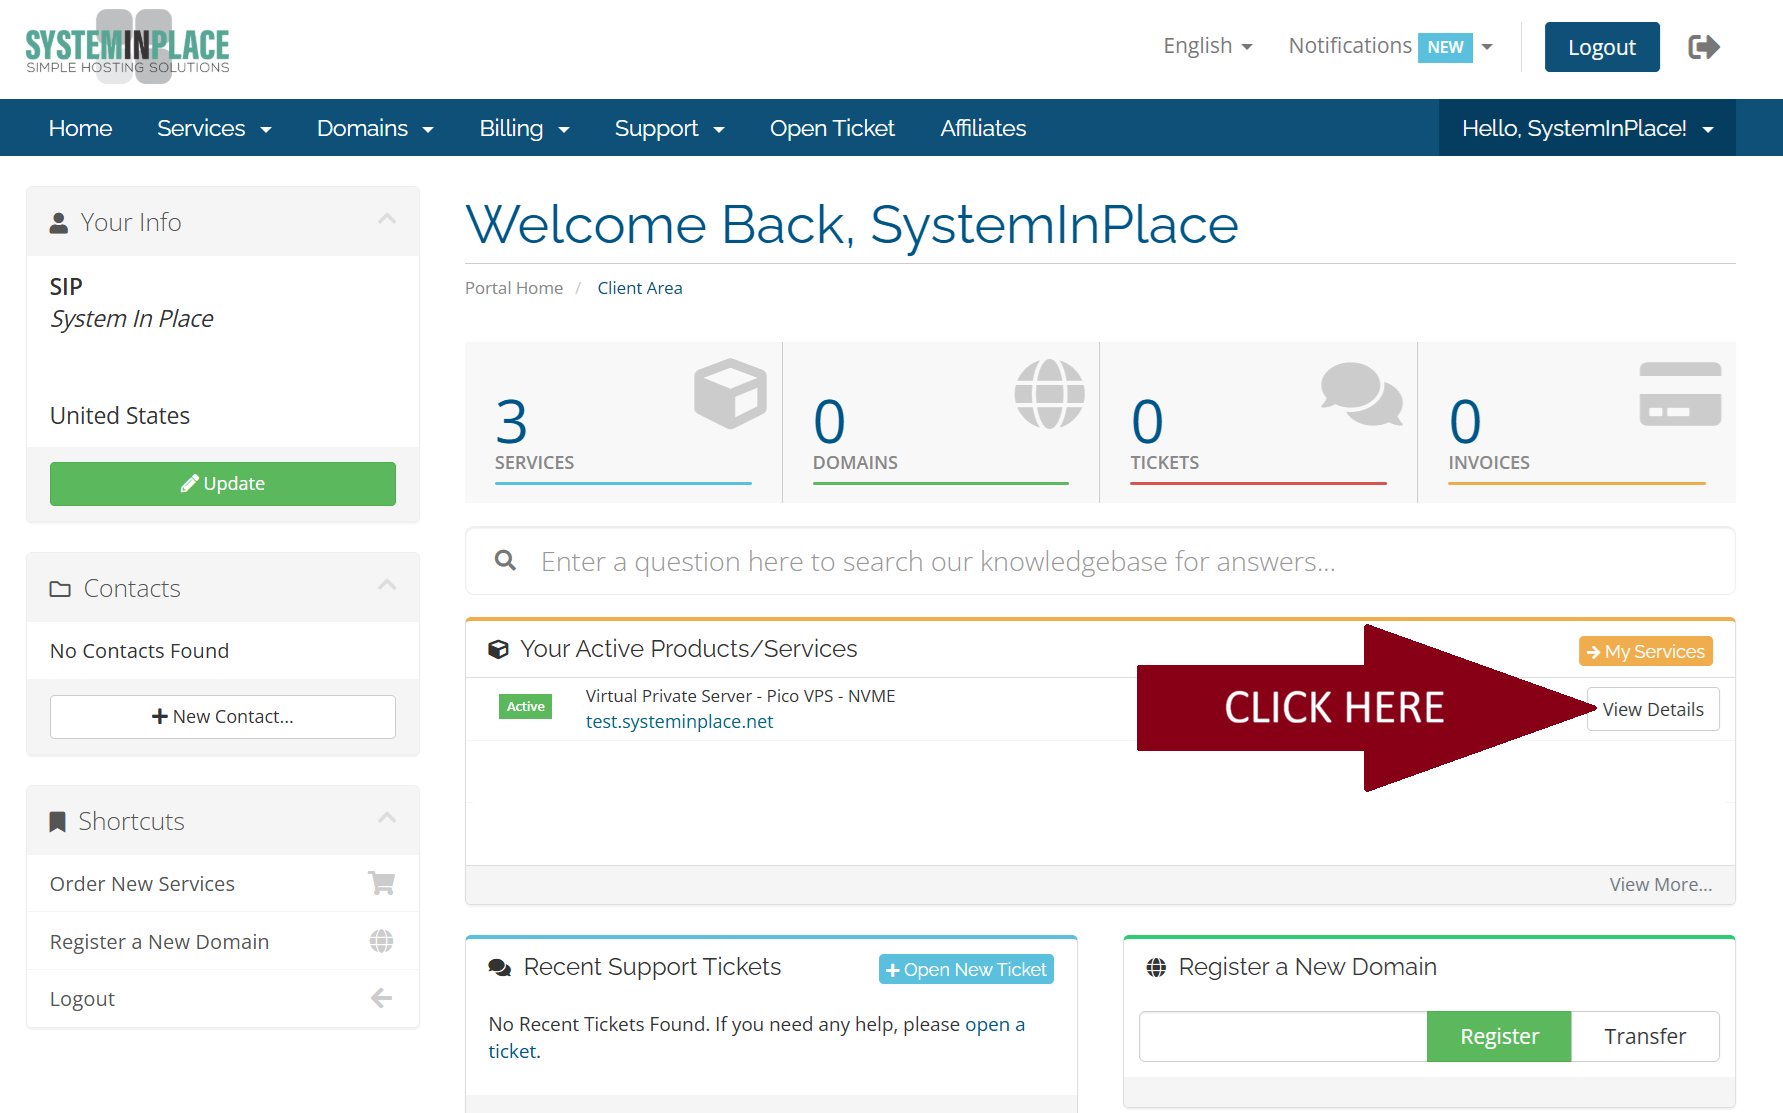
STEP 1: From your billing panel home page, locate the service which contains the IPs that you wish to change the RDNS on. Next to that service, click on VIEW DETAILS.
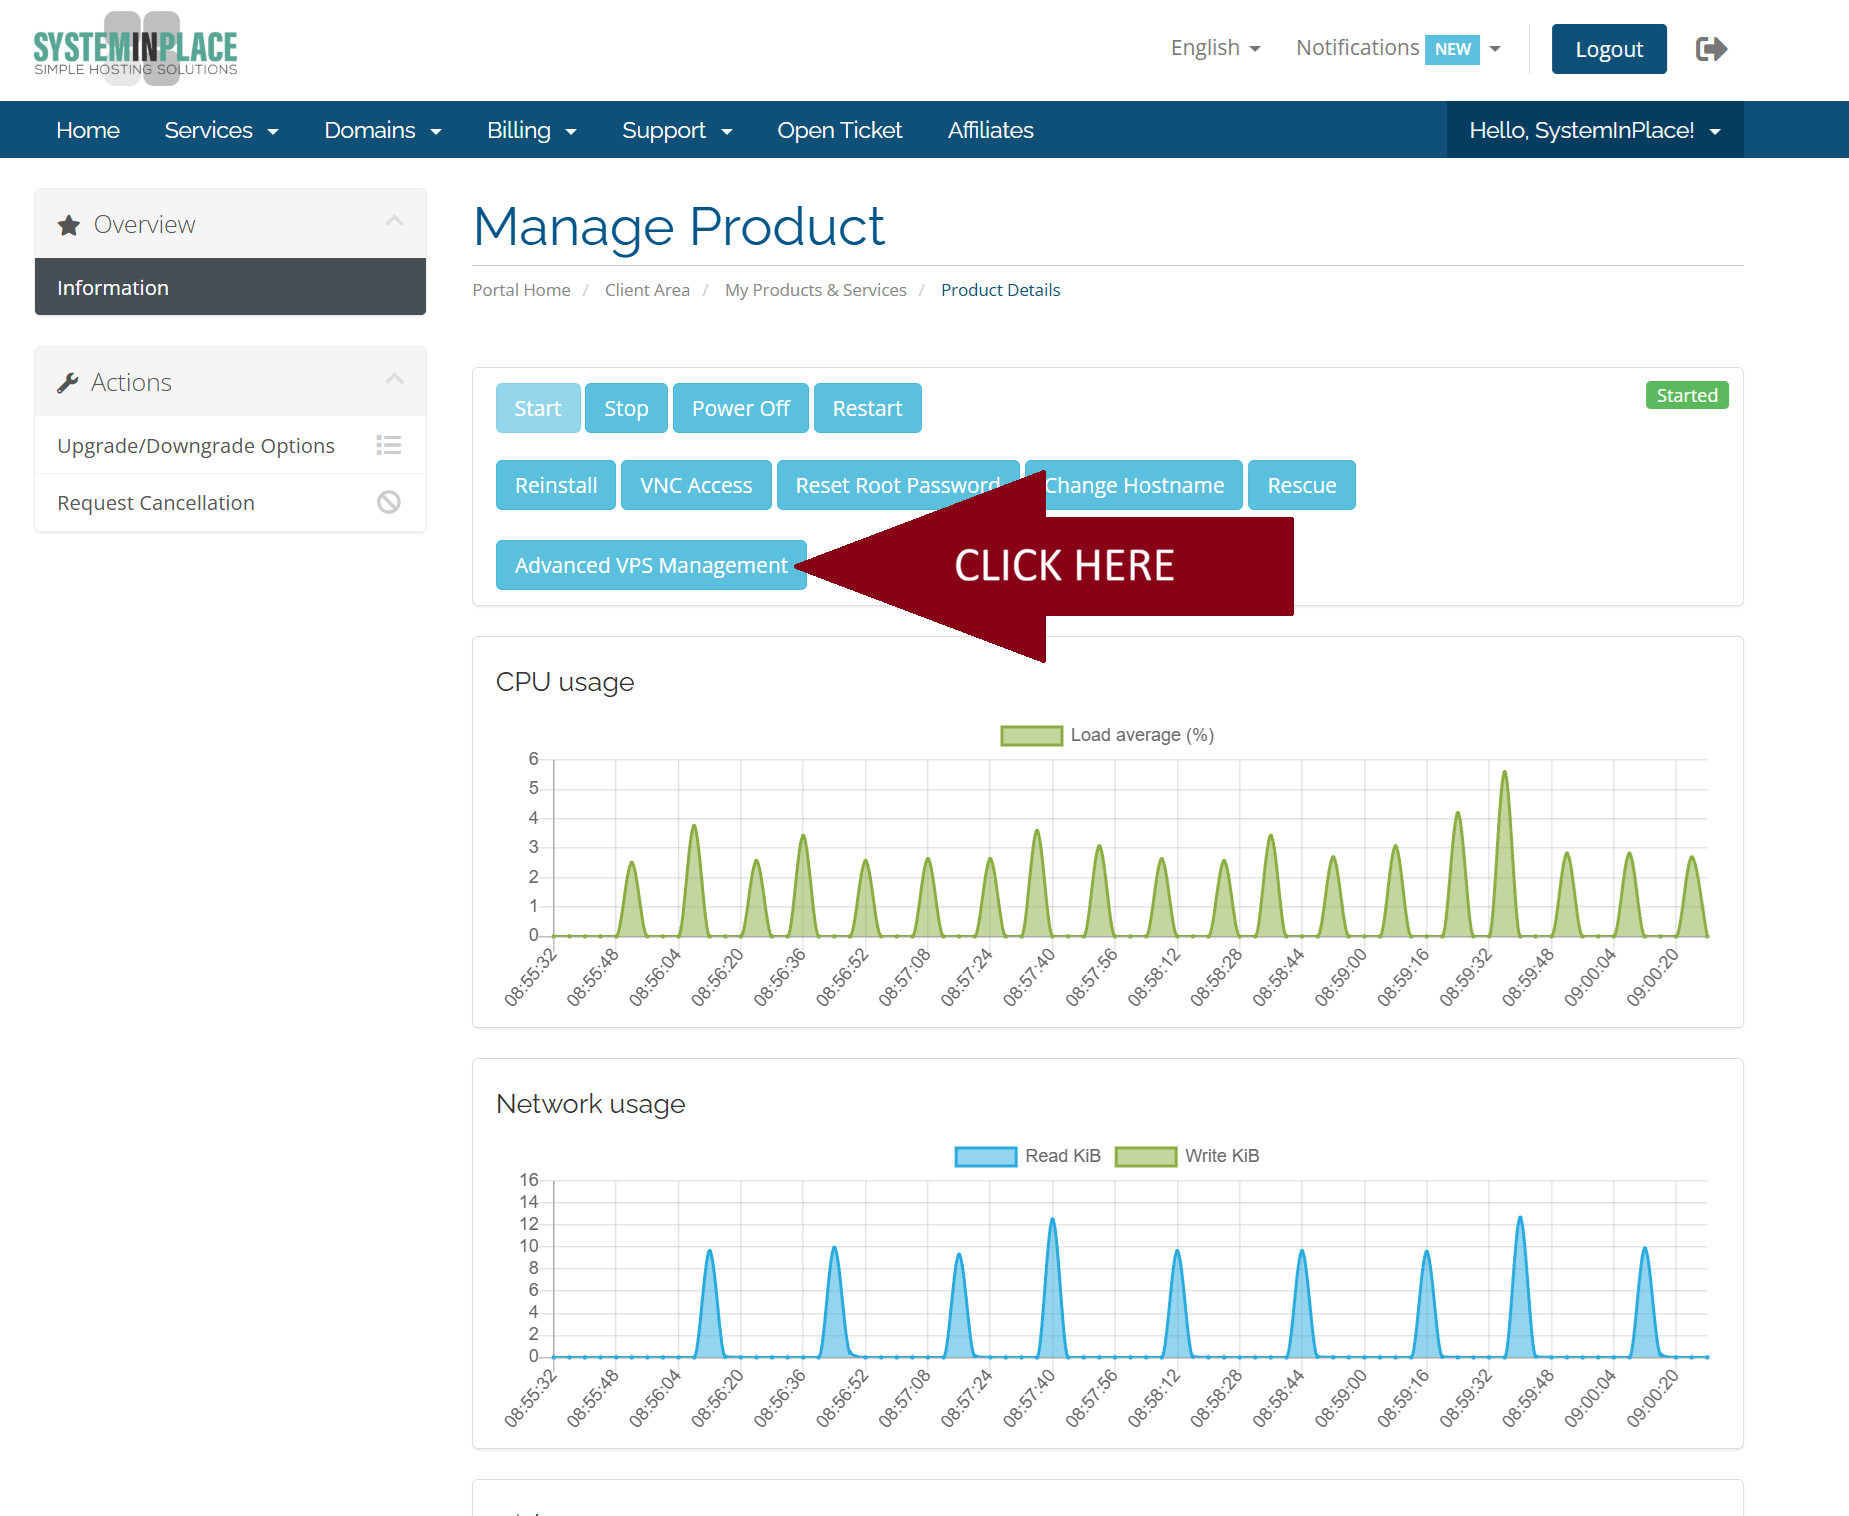
STEP 2: Locate and click on the blue button that says "Advanced VPS Management"
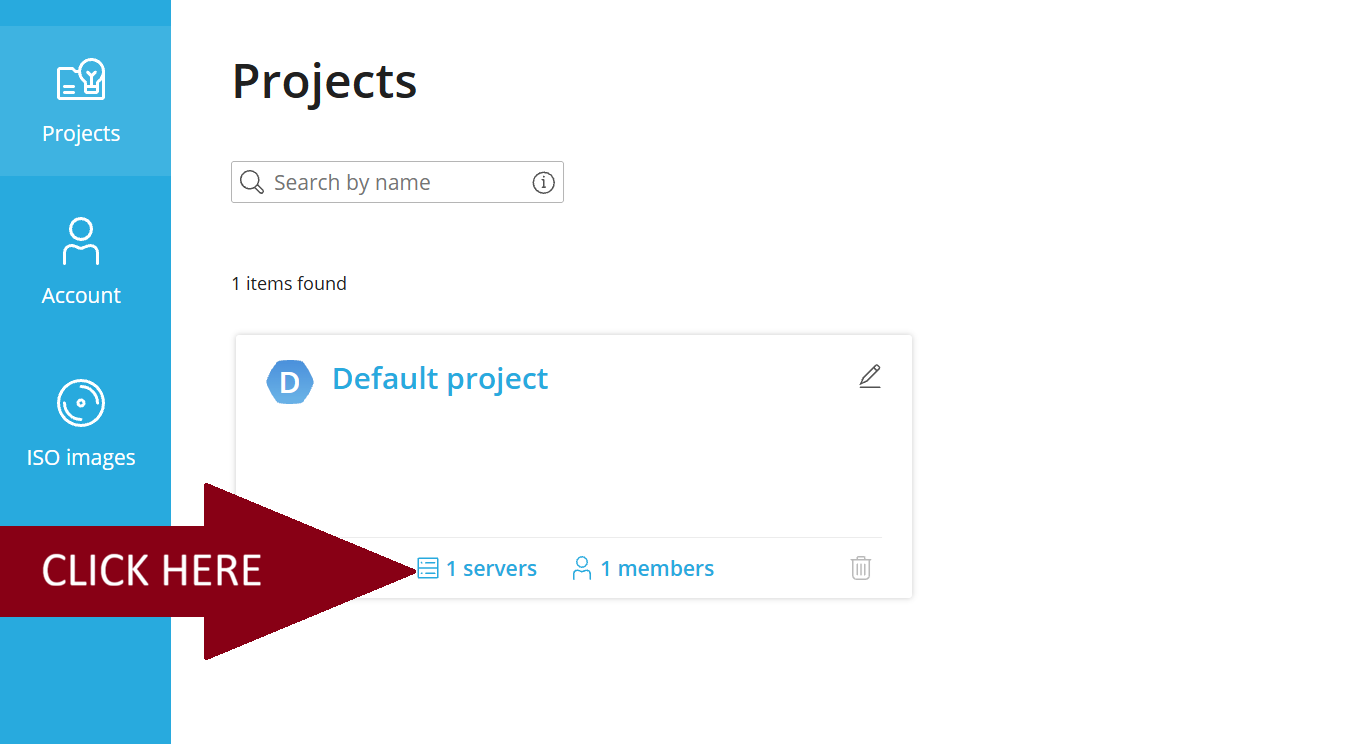
STEP 3: Locate the project that contains your group and click on the "Default Project" name or the "# servers" count at the bottom.
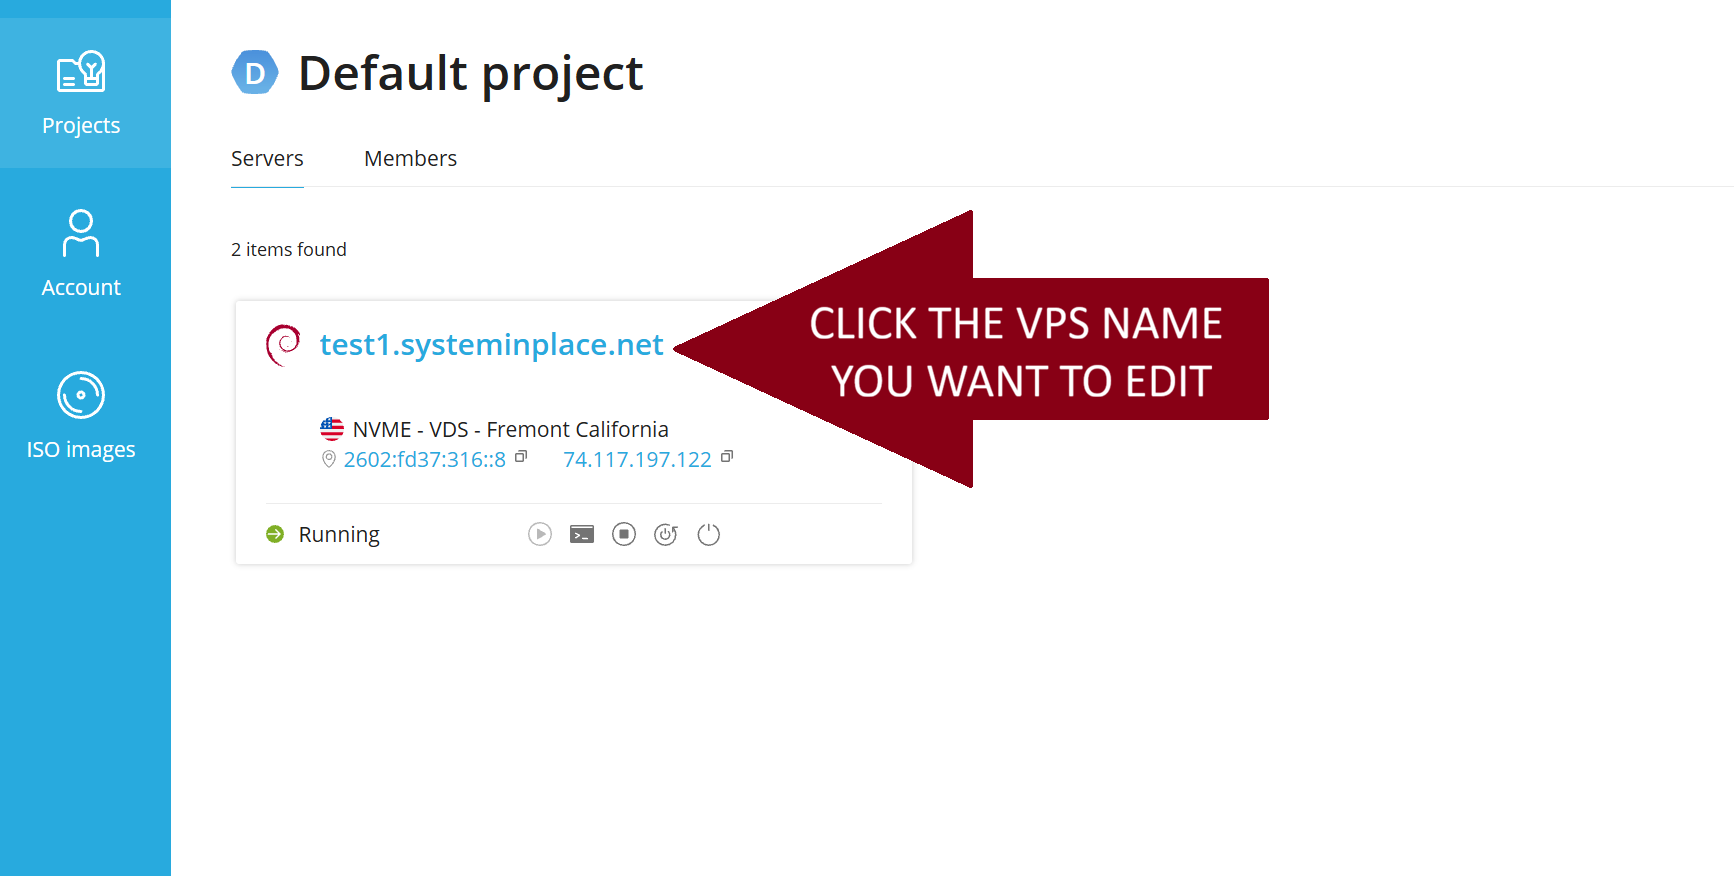
STEP 4: Next, your VPS list may contain multiple VPS. Locate the VPS that contains the IPs you wish to manage the RDNS for. Click on that server name, in this example, we select "test1.systeminplace.net"
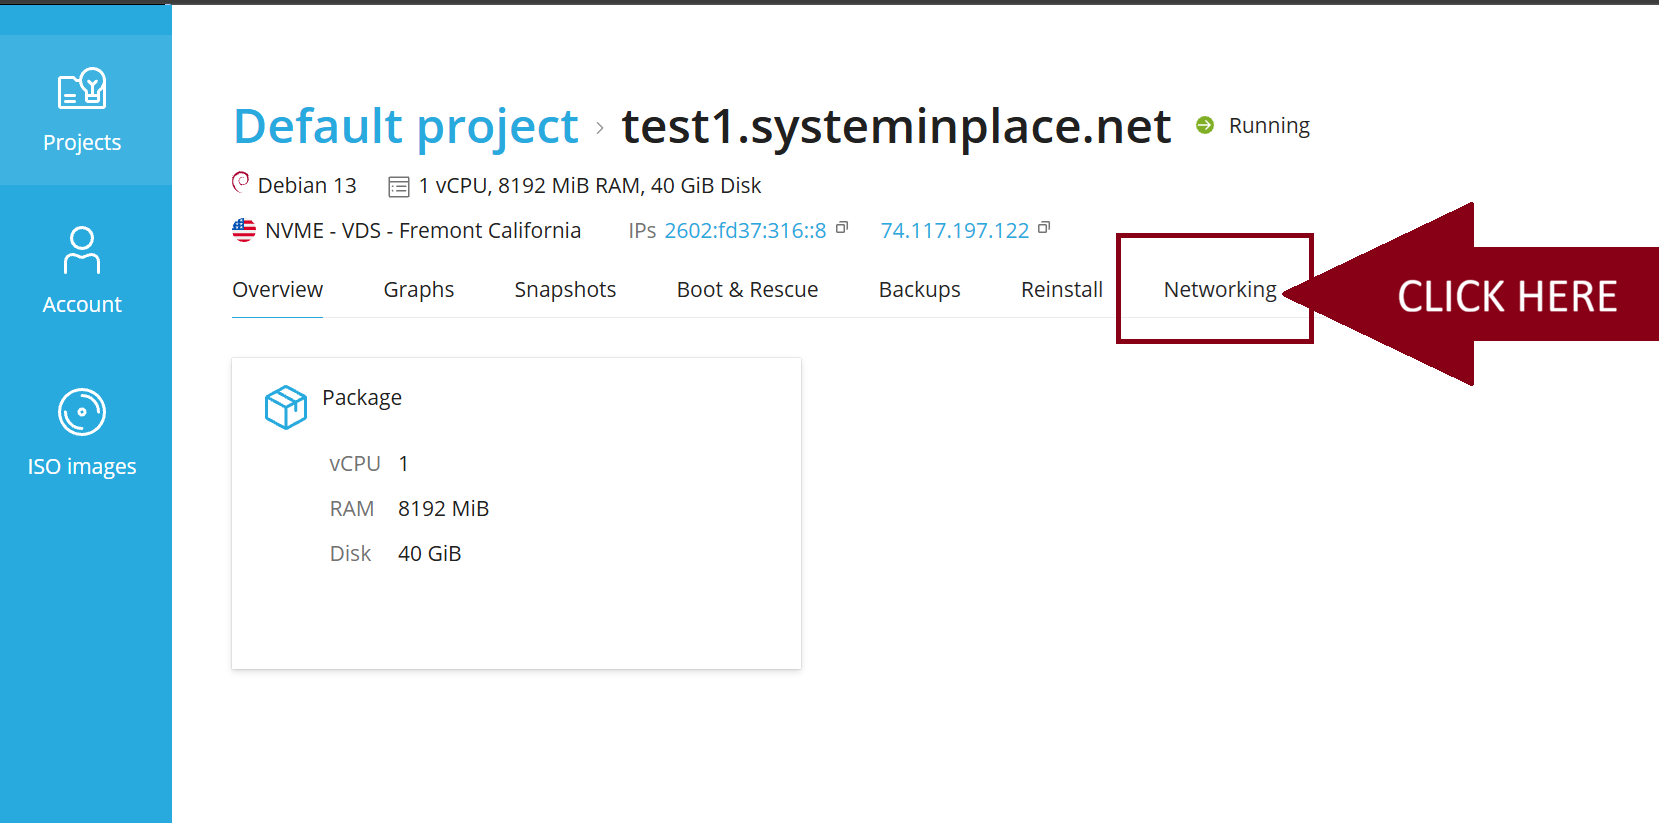
STEP 5: Once you have selected the VPS, click on the "Networking" tab.
STEP 6: Locate the line which contains the IP you wish to set the RDNS on. There will be one line for each IP you have been assigned. Click on the Settings button to the far right of each IP to select it.
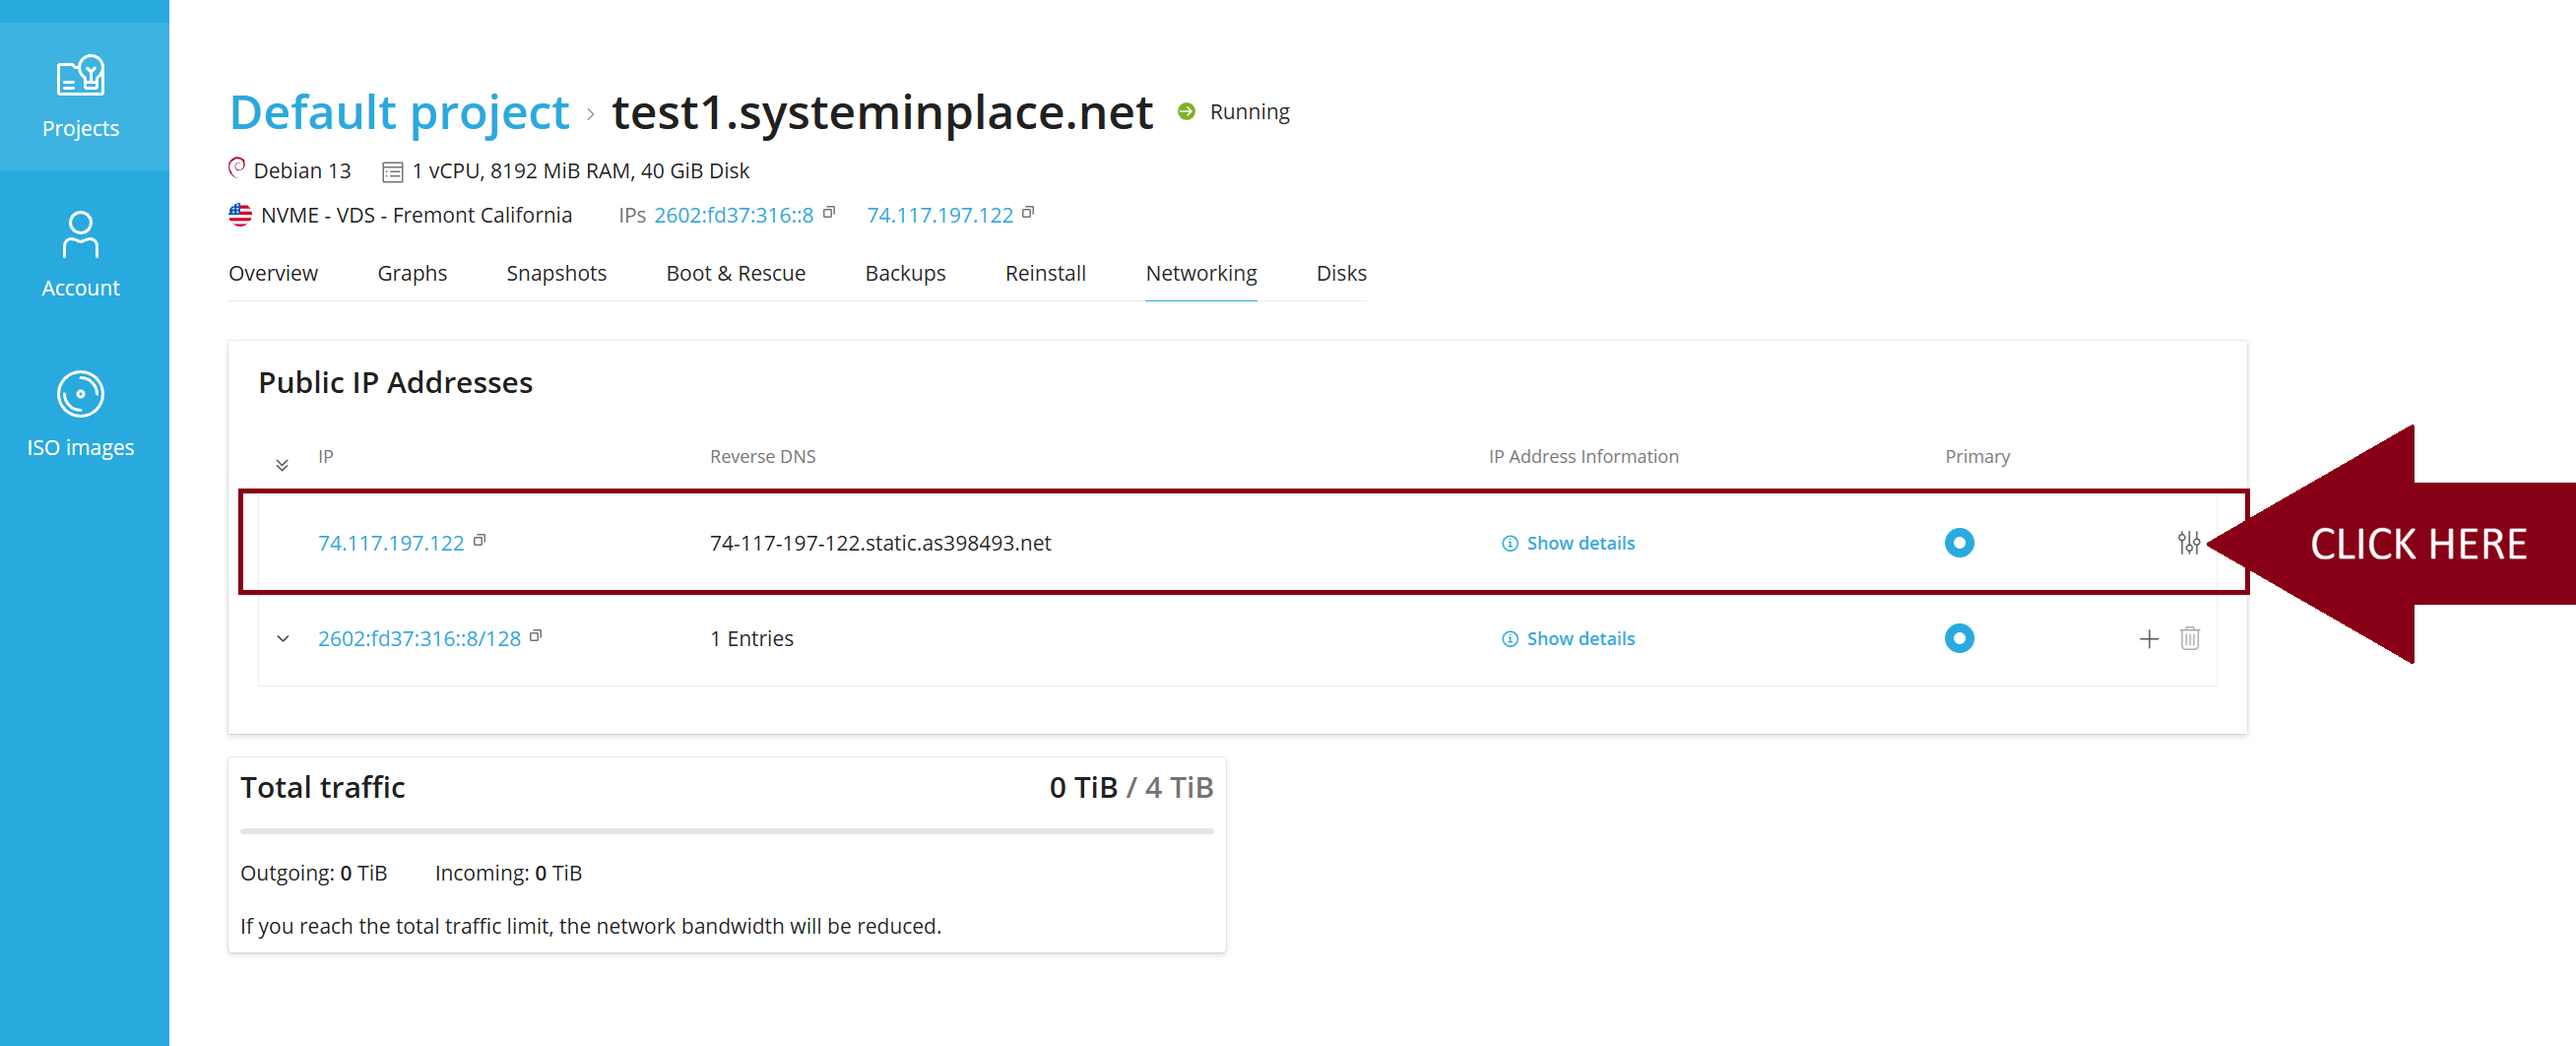
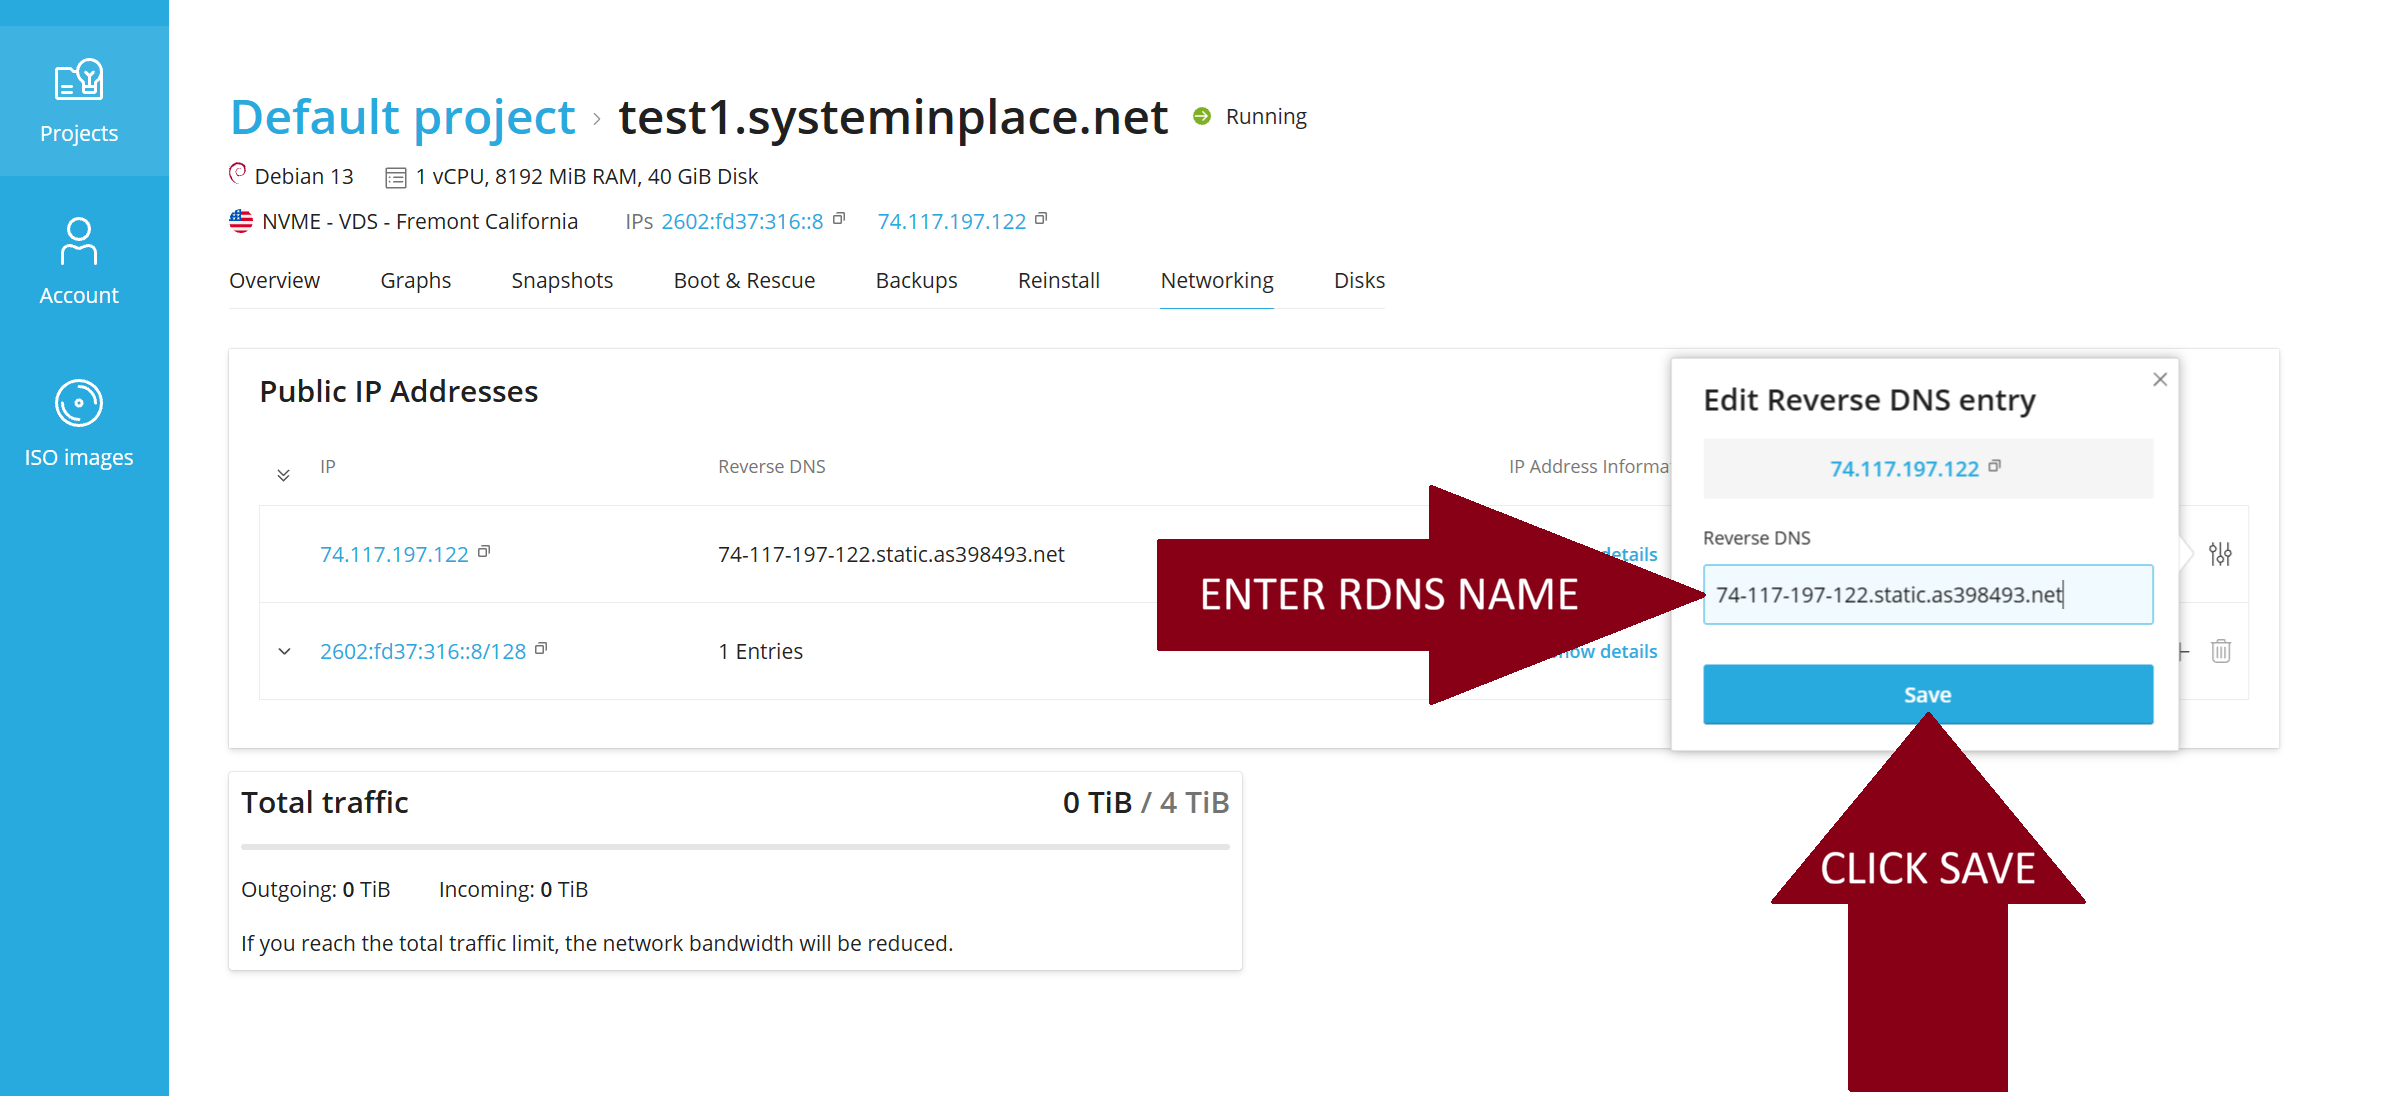
STEP 7: Select and delete the current default RDNS, in this case: 74-117-197-122.static.as398493.net, replace it with the RDNS you wish to set and then click on the Save button.